Ministry Kids Appreciation Night :)

This post is shared with ministry families in mind and on my heart : )

October is Pastor Appreciation month, a time when many Church families extend appreciation in various forms to their Pastor and ministry family. It is a time of encouragement and kindness; truly a blessing for the whole family!

I was reflecting this past October on our children, on the behind-the-scenes sacrifices that Pastor’s children make for this position that God has called their Daddy to fulfill. Our children are familiar with having plans change at the sound of the phone ringing…being buckled up in the van, ready to go on an outing then hurriedly getting out so Daddy take the vehicle to go and help someone in need. We have witnessed how God has used this to produce understanding into these little people! Their Daddy is very good at rearranging things so he can still make up for a lost outing and they accept last-minute changes without fuss, a characteristic of the kids that God has opened my eyes to, made me more aware of this year – something to show them appreciation for indeed!

There is also the ‘waiting’ to take into consideration…as PKs, they are the first to arrive at Church on Sundays (9am, long before Sunday School begins) and usually the last to leave (1pm, a good hour after the Church service has concluded) ~ this equates to a lot of waiting around! We have witnessed God at work in them during what adds up to hours of waiting each month. God has cultivated patience in them as they wait around…and our church family has never made mention of their after-church snacking or the crayons or scrap paper or toys that are floating around the Pastor’s office! 🙂 (The picture below still makes me chuckle! We took it a few years ago of our youngest son – the result of waiting around the Church for Daddy one day, he fell asleep in a pew! : )

With the sacrifices, there are also many positives of ministry family life. It is really wonderful for them to see that Daddy can provide for his family with a job of helping people, praying, studying God’s word and sharing God’s truth with others! God has also used this lifestyle to build understanding and compassion into their little lives. They are very quick to pray for others! They often have a  front row seated to answered prayers!

All of this to say, this past October, we celebrated our first ‘Ministry Kids Appreciation Night’. Really, the only difference from our regular planned Family Night was that as Mom and Dad, we talked specifically about what we appreciate about them as ministry kids – the characteristics we see in them as they continue to grow up both physically and spiritually. We expressed to them how their patience, understanding and compassion blesses us and how it makes it easier for Daddy to have the freedom to do his job. An evening all about them – they loved it! We wanted it to serve to encourage them for their roles in our family. It will definitely be a ‘to-do’ each October now : )

The way to absolutely delight our children tends to be through a trip to the kitchen! A new favorite recipe in our family that we made that night is ‘Hot Vanilla’. I read this somewhere and jotted it down but cannot remember the original source. It is so good, too good not to share!

Hot Vanilla:

– 1 cup of milk (per each serving)

– 2 tsp sugar (per each serving)

– 1/2 tsp vanilla extract (per each serving)

Topping:

– 1/2 cup whipping cream

– 1 tbsp chocolate syrup

– dash of cinnamon

———————–

Start with the topping. In a medium bowl, whip the cream until it’s frothy. Add the chocolate sauce and cinnamon, then continue to whip the mixture until everything is well blended and peaks form. (Makes enough to top about 6 drinks)

For each Hot Vanilla, heat up the milk and sugar in a pot on the stove top. Stir in the vanilla extract. Top with a dollop of the topping, drizzle with chocolate sauce or a dash of cinnamon.

This special drink sealed the deal for the whole evening : ) It doesn’t take much to bless children – children are typically wonderfully enthusiastic! As it always seems to happen, having this evening with the intention of blessing them, blessed us as parents. It felt great to give them recognition and appreciation for their roles in our ministry family!

Summer Ice Castles

Image 

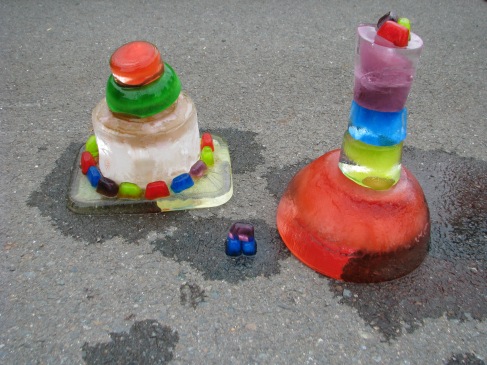
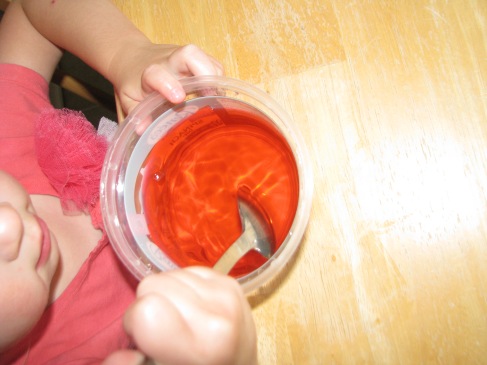
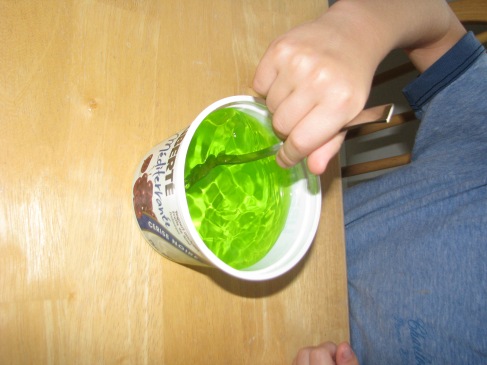
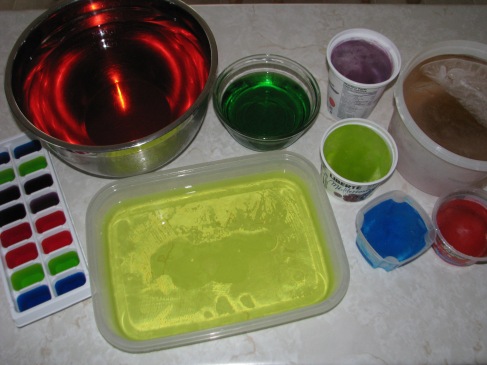
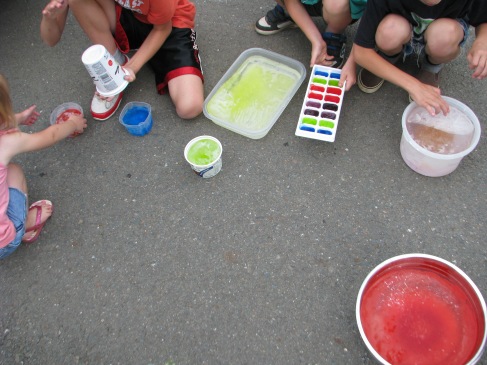
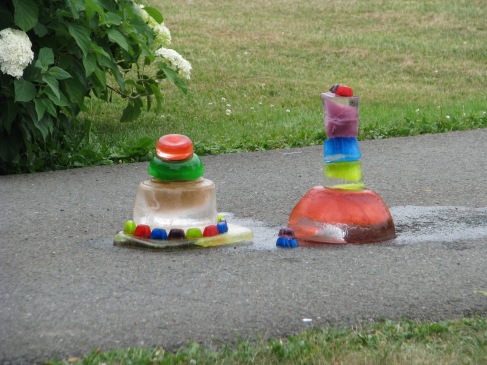
Ice castles = a super-easy project for kids and so much fun! Fill containers of different sizes with water. Add food coloring to the water and freeze overnight.

Image


Image

Image

Assemble in the morning!

Image

We had been watching the forecast, waiting for a really hot summer day to do this project together. We all made guesses to see how long the ice castles would stand before melting into colorful puddles. No one (not even Mom & Dad) came close to guessing the right amount of time! We also had a contest afterwards to judge whose HANDS were the most colorful after building the castles!  ***Parental disclaimer – be sure the kiddos are wearing ‘play clothes’ as food coloring can stain*** 🙂

This was quickly labelled a new summertime favorite! Image

Our oldest also suggested we try it in the winter to decorate outside…so they got busy to work, discussing and making plans so they’ll be prepared when the snowy season begins…in about 5 months 😉

Bird Feeder Craft for Kids

This is such a fun and easy project for little hands! To make these little peanut butter bird feeders, you need just a few items that are typically easy to find around the house:

– empty toilet paper rolls

– peanut butter

– birdseed

– string

– hole puncher / scissors / butter knife

Using the hole puncher, make two holes in the cardboard paper rolls to be used for hanging the bird feeder up with the string. Then spread with peanut butter to cover the outside of the roll.

Roll the roll in birdseed!


Simple, easy and cheap to create – just hang it up and let the little ones enjoy!

Mom’s Homemade Hot Chocolate

A chilly April week-end is reminding us that it is not summer yet! The flip flops we wore last week have been swapped for rain boots & sweaters today. A great day to warm up with a cup of hot cocoa!

This is my Mom’s (and Grandmother’s) recipe – simple, homemade & delicious!

For each serving size you need :

– 1 cup of milk

– 1 tbsp of cocoa

– 1 tbsp of sugar

 Whisk all 3 ingredients together over low heat on the stove top.

Continue mixing over medium-to-low heat until you reach a smooth consistency and desired temperature. That’s it! 🙂

For fun, I used tiny cookie cutters to turn store-bought marshmallows into little shapes for the kiddies! (A ‘Pinterest’- inspired idea! Original source – www.tambouille.fr)

It was so cute to see their reactions! A simple marshmallow trick that brought a lot of excitement to our children’s day!


Homemade Granola

This is a favorite recipe in our home! Homemade granola doesn’t contain any preservatives and you get more for your dollar! This is a modified version of a recipe from one of my best childhood friends. It will keep in the fridge for up to 3 weeks (though we haven’t had to put that to the test yet 😉 )

You need:

– 4 1/2 cups of oats

– 1/2 cup of brown sugar (Organic cane sugar is a nice substitute here)

– 1/4 tsp sea salt

– 1 & 1/2 tbsp of cinnamon

– 1/4 cup of flax seeds

– 1/8 cup of sesame seeds

– 1/4 cup of sunflower seeds

– 1/4 cup of pumpkin seeds

– 1 cup of chopped almonds

– 1/2 cup of vegetable oil

– 1/2 cup of honey

Preheat the oven to 250F

Mix the dry ingredients together in a large bowl then add the oil and honey – mixing into the dry ingredients well. Put 1/2 of the mixture in a thin layer on 2 parchment lined baking sheets.

Bake for 45 minutes. Let cool, store in the fridge and enjoy! It’s a great power snack alone, as a topping for yogurt or as a hearty breakfast cereal with milk!

Budget-Friendly Mommy & Me Dates

Right before I gave birth to our second child, I took our firstborn out on a date, just the two of us.  A last hurrah, if you will, before all of our lives changed forever with the arrival of our new family member. I will never forget that first intentional date with my little man! I took him to a local dairy bar for an ice cream cone. He was so little! He sat on the picnic table, facing me, with his wee little feet resting on my knees. It was a beautiful late spring afternoon with a nice breeze coming off the river…we enjoyed our ice cream and then I remained sitting, in all of my almost-due roundness, watching this wonder of a little boy chasing a butterfly around in the warm sunlight.

Fast forward 8 years later and we are still enjoying our once-a-month, one-on-one special outings together! Initially, I thought this would be a way for me to give some undivided attention to each child…to bless them with time & attention alone with Mom. What I hadn’t taken into consideration is how much it would bless ME! God has given me this gift of time with each of these four special blessings, set apart from the everyday busyness (laundry/meals/homework/music/sports/potty training etc) and it enriches BOTH of our lives. To hear them talk, uninterrupted by siblings, and to do special things together makes memories that we share and gives them the knowledge that they are treasured. These outings are simple but oh so valuable.

Some of our cost-effective favorites are :

~ hikes to explore different areas (FYI: boys LOVE this one!)

~ dress up & pretend (our daughter LOVES this! ***A great opportunity to buy dress up play costumes is right after Halloween when stores reduce the prices to around 75% off the regular price. We also just got a couple of great finds at our local consignment shop too!)


trips to our local art gallery

~ bike rides

~ trips to the library

~ drawing with sidewalk chalk (our boys love to help draw a little town – roads & buildings for their hot wheels to drive around on the driveway)

~ trips to the farm market 

~ anything that has to do with acquiring snacks!

~ snowshoeing

~ snow painting (food coloring mixed with water in a spray or squeeze bottle) 

~ sharing hobbies, like photography & music

~science experiements (www.pinterest.com has compiled many great ideas for experiments from a lot of different sources/sites/blogs, etc.)

~ special alone time at home in a separate part of the house from the other family members to do a board game, craft (which if you have boys they prefer to refer to this as a ‘project’ not a craft – haha), baking or reading a book series together. (A friend who has two grown boys recommended the “Little House on the Prairie” series which is now a hit in our home. It is interesting for boys & girls alike)

My husband is really good at having one-on-one time with each of our four children at random throughout the month. But, like a lot of moms, I have to mark things on the calendar to ensure that I can make it happen and not let the time go by in the midst of all the other activities that take place. And I am always so glad we do! It’s such a simple thing to share and encourage others in but the rewards are far-reaching! Being budget-conscious doesn’t mean you have to be limited in special experiences together. For those sweet ladies who shared their frustrations about their budgets with me, I would love to encourage you and share with you how much these special times have blessed me without straining the budget!

Homemade Laundry Soap

One time, not so very long ago, I unintentionally skipped several days in a row of doing laundry…as you can imagine with four young children to care for, our laundry hamper was then filled to the brim, high and beyond, with all of the laundry waiting to be done. So high was this pile, it caused our 7-year-old to excitedly call out to his older brother, “Hey! You’ve got to come see this!! It’s a laundry SKYSCRAPER!!!” :}

I knew I was doing a lot of laundry, however, once I started keeping track to see how many loads were being done in a month, I was surprised to realize that we average 14-16 loads per week! (An HE washer is definitely a consideration for the future! :} That many loads adds up to a lot of money being devoted directly towards just detergent alone!

There are lots of different recipes to choose from when setting out to make your own homemade laundry soap but many have the same three recurring ingredients (Washing soda, Borax & laundry bar soap) with some options to personalize to your preference (ie: essential oils, etc).

What I decided on was a modified version of a couple of different recipes that I liked – it is so easy and very cost-effective! This amount should last for around 4 months and the entire cost was under $20!

You need:

One 1.81 kg (4lb) box of Arm & Hammer Baking soda

One 2.15kg (4lb, 12oz) box of Borax

– 1.67kg of Arm & Hammer Super Washing Soda (I could only find this in a 3lb 7oz  box so that would equate to 1/2 of this box)

Three 155g (5 1/2 oz) bars of laundry bar soap (I used Fels-Naptha, which is safe for sensitive skin and has a nice, mild scent. After researching different recipes & sites, Pure & Natural, Ivory, Zote & Sunlight are all also touted as effective choices and HE washer safe too – it would seem that it is just a matter of personal preference)

***Finely grate the laundry bar soap.

Next, add all ingredients together in a laundry bucket, (lined with a garbage bag) tossing the ingredients together to mix well. Store in a container and use 1-2 tbsp per load. (I purchased this 2 gallon glass container and the scrapbboking stickers to label it from WalMart and the little scoop from our local Dollar Store) It is really that easy and it works great even in cold water! I love it! I still use a fabric softener and they pair well together.

***A fun little side note – I later found several sources that called for microwaving the bars of soap for 60-90 seconds each instead of using the grating method. With an extra bar of soap just sitting in my cupboard, of course I had to try!

This is the ‘before’ shot –

And this is the ‘after’ –

It was such an unexpected consistency – dry, brittle & crumbling to the touch. A much easier way than grating to prepare the bar soap for the recipe! And fun to boot – like a little mini-science experiment to involve the kiddies in! It crumbles easily to an even finer texture than grating. Definitely the way to go next time. ***

Fun with chocolate!

Each year, a tradition we have, is to celebrate the new year with a chocolate fondue! This year we tried a new recipe~Toblerone Chocolate Fondue! My sister-in-law tipped us off to this wonderful concoction and it is even better than it sounds! 

The recipe is from:

www.kraftcanada.com/en/recipes/toblerone-chocolate-fondue-87514.aspx

But to add even more fun, I ‘dressed up’ our glasses of milk…

So much fun and so easy to do! Just melt chocolate in a pan over low heat on your stove top. Dip the rims of your glasses in the chocolate and then sprinkle festive edible sprinkles and edible confetti over the rim. (I tried, unsuccessfully, dipping the chocolate rimmed glasses in a bowl of the edible sprinkles/confetti but it resulted in a gooey chocolate mess!) After prepping the glasses, I put them into the fridge to set until we were ready to have them! An inexpensive way to exercise some creative energy & make a glass of milk something extra special for the kiddies!

School Lunches

This past Fall, our third child started Kindergarten, joining his two older siblings at school…and school lunches for three began! This idea is one that a dear, like-minded friend shared with me, that she gleaned from a friend and so on…moms do love to pass on excellent ideas!

Using Rubbermaid ‘Take Alongs’ food storage containers & silicone muffin cups , you can create divided lunch boxes for a fraction of the cost of the lovely, but pricier versions and achieve the same results. They make lunchtime fun and litter-less!


An additional cost saver is buying yogurt in bulk & portioning it into reusable containers. Paired with silverware instead of plastic spoons, this saves money & is more eco-friendly too! (Containers shown are also Rubbermaid ‘Take Alongs’, which are a great size for this)